Tuesday, September 27, 2011

Tutorial: A Better Dust Ruffle

Dust ruffles are practical (they hide the stuff under the bed) and pretty (they finish a bedroom nicely) and annoying (they never stay where they are supposed to and are often a little too short or a little too long) and sometimes hard to come by (in the right color, mattress size, and length).

I fixed every one of those problems. You're welcome. 

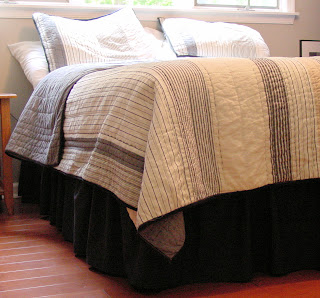
One of the bedrooms needed a black dust ruffle, full, ruffled-not-tailored, and with a 20" drop. Impossible to find in town, easy to order online, although as a 21" drop. After thinking through the steps of making a perfect dust ruffle for my master bedroom redecorating project, I came up with this method of altering a purchased dust ruffle to make it easier to install and live with. No velcro, no hot glue guns.

Keep in mind that a dust ruffle, or dust skirt, has two parts: the "deck" which is the flat piece of fabric that covers the box spring, and the ruffle, or skirt, which might be pleated or gathered. Either style of skirt will work with this method. You need your dust ruffle, shears, and a package of twisty pins, otherwise known as upholstery pins. You'll find them at fabric shops, dollar stores, and sometimes department stores. 

1. Cut the center of the deck out of the ruffle by leaving a 4 inch border on top of the seam where the dust ruffle is attached. In my picture the ruffle is black, the deck is white (they usually are), and I have left a 4 inch border all the way around the dust ruffle.
Keep cutting around the entire dust ruffle, maintaining the same 4 inches, being careful to only cut the deck fabric. You will end up with this,
a rectangle of fabric from the center of your dust ruffle. Rip it up, it will be a great addition to the rag pile. The dust ruffle is now a long strip, like this:
2. You need to finish the long edge you just cut, or it will continually unravel and be a nightmare after you wash it. You can serge the edge or zigzag it if you have machines. If you don't you could press a small hem and use fusible tape, or put in a movie and settle in for a handsewing session. I serged.
3. Press the dust ruffle before attaching it to the box spring. The mattress does not need to be completely removed but can instead just be pushed off to the side a bit to give you room to attach the skirt border with pins. Start with a corner since the skirt has more gathers there, or possibly a split, to allow for a smooth turn.

4. Work your way around the bed, paying attention to the hem and how even it is along the floor. Use as many pins as needed to keep the ruffle from shifting.
Easy to remove for washing, it will stay in place when the sheets are changed, and it can be adjusted all the way around. Not a bad 30 minutes!

Wednesday, September 21, 2011

Sewing Machine Hypnosis


While thinking aloud to a sewing friend about the process of making this dust ruffle, I realized that I would be running 20 yard lengths of fabric through the machines several times as I hemmed, serged, gathered, and attached the pieces. I confessed that I like mindlessly sewing long seams. There is something hypnotic about the combination of the sound of the motor, sitting still, and basically staring into one focused spot.  My friend instantly understood, replying, "Listen - there are days when all I should do is take the needle out of the sewing machine and just sit there with it running."

I am still laughing. 

Sunday, September 18, 2011

Bedroom Redecorating: Materials

New floors, freshly painted walls, "cloud white" woodwork and doors and finally - it's textile time.

I've gathered floor coverings, quilts, shams, lengths of fabric, window panels and hardware and have spent the weekend sewing. It's coming together. There's a bit of a progression from light to dark: a fairly reflective shade on the walls, cool and light bedding, the windows are a little more saturated, and the rugs are vibrant against the dark floors, with pops of accent colors. 


Finished pictures just as soon as I'm finished, although it's pretty scary to publicize your project. What if it doesn't actually turn out all that well?? More soon!

Thursday, September 15, 2011

How to Eat Supper

Do you know NPR's The Splendid Table? If yes, then you must know about the How to Eat Supper: Recipes, Stories, and Opinions from Public Radio's Award-Winning Food Show cookbook. If no, then go find a copy. It has all the qualities a cookbook, or any book, should have: nice binding, great pictures, solid writing and strong opinions, and a pretty cover. Then there are the recipes, which haven't let me down yet.

I took their recipe for Sweet Roasted Butternut Squash and Greens over Bow Tie Pasta and turned it into Here's What I had in the Fridge Instead Pasta, and it was delicious. Instead of greens I used brocolinii, a delicious cross between broccoli and Asian broccoli, and substituted a different pasta and cheese.

Following their recipe I tossed butternut squash, broccolini, onion, basil, sage, and garlic with olive oil and a bit of brown sugar. 

Everything was roasted for about 25 minutes and then the whole sheet had a quick broil to caramelize the squash a bit.
Meanwhile, since my husband really thinks every meal and snack should include bread and I have him convinced that polenta is the very same thing, I started some spears crisping on the stovetop.
I had some really nice pappardelle left from a whole package. My ratio of pasta to vegetables is usually quite heavy on the vegetable side, much to my husband's dismay, but gives me less of a twinge nutritionally and financially when I buy a fabulous imported pasta. 

Finally, the drained pappardelle went back into the pot where it was tossed with the vegetables, a little half and half, and Parmigiano-Reggiano (another substitution). 

It's going into the recipe journal, by unanimous decision. The crisped polenta was a nice accompaniment, as would be some white beans with sage. Next time. 

Wednesday, September 14, 2011

Breakfast Failure


Minnie pretty much sums it all up this morning.

After cooking a dinner that was heavy on prep (white bean cassoulet) and then cooking and packaging a week's worth of dog food (!) my final act was to set up breakfast. I don't do this all the time, since everyone here is quite capable of making their own damn breakfast, but it's lovely when I do. I put a mix of barley, wheat berries, and cracked whole grain cereal into the rice cooker and set the timer for 6:00 a.m. I set everything out...


Pumpkin seeds, honey, agave nectar, Vietnamese cinnamon, cinnamon & white sugar, dried cherries, brown sugar, and slivered almonds. A perfect topping bar.

Picture it: Wake up early (blame the moon?) and feed the dog his freshly made and balanced meal, complete with a powdered vitamin/mineral supplement. Make a latte with skim milk and a bit of powdered cocoa (flavanoids, anyone?), turn on the laptop and go check on the ... uncooked grains. Open the lid. Peer inside. Check timer and discover that the time is now 19:05.


Apparently while I was away this summer I lost the ability to correctly program the timer on the super-smart fancypants rice cooker. It was 9:00 p.m when I set it, I asked it to be ready at 6:00 a.m., and I absolutely pushed the start button and hummed along to the little tune that plays. (Those crazy guys at Zojirushi and their tunes.)

Push start again, and make a small pot of steel cut oats for the next person awake, who is expecting a healthy bowl of grains this morning. 

Make another latte.


Saturday, September 3, 2011

Butternut & Pecans; Potatoes & Onions


Last night's dinner was a combination of a favorite potato and onion tart and a box of organic frozen butternut squash ravioli. Not sure of the squash ravioli's reception, I planned to plate a piece of the sure-to-be-devoured tart with a few of the ravioli topped with a pecan sauce and a side of fresh green bean gremolata. I killed the green beans - the pan is still soaking - but our vegetable-less meal was still delicious. After facebooking the menu and lamenting the loss of the green beans, the recipes are now in order for a few friends. 

No pictures, but trust me. That picnic tart has been served for friends at home, carried to potlucks, and eaten as leftovers for breakfast. 


French Picnic Tart with New Potatoes, Red Peppers, Sage, and Gruyere
Mollie Katzen’s Vegetable Heaven

1 10-inch unbaked tart crust (easy recipe below or buy one!)
1 lb small red potatoes
1-2 T olive oil
1 large onion thinly sliced (2 cups)
1/2 tsp salt
1.5 C grated gruyere or emmenthaler cheese (1/4 lb) shredded
2 T minced fresh sage (or 2 tsp dried)
1/2 medium red bell pepper, finely sliced

Preheat oven to 375 degrees.
Place potatoes in saucepan, cover with water, and boil for 10 to 15 minutes until tender but still intact. Drain. When potatoes are cool enough to handle, peel if desired, and slice thinly. 

Heat oil in a skillet for the onions, add onion and salt, cook on low heat until tender (10-15 minutes)
or continue and caramelize.  Remove from heat, sprinkle with pepper, and set aside.
Assemble the tart:
  • Spread one cup of cheese into bottom of unbaked crust. 
  • Spoon onion over the cheese, and sprinkle with sage.
  • Arrange slices in overlapping concentric circles over cheese.
  • Arrange bell pepper slices over potatoes in ring. 
  • Sprinkle with remaining cheese and black pepper to taste.
Bake for 35-40 minutes, on a tray unless you really trust your springform pan, or until crust is golden around edges. Move to lowest rack for last 5 minutes to ensure the bottom is cooked and crisp. Remove tart from oven and let cool for at least 10 minutes. Serve sliced into large wedges either hot, warm, or at room temperature. 

My additions/changes: 
I don't use the red pepper, but I have inserted a layer of cooked spinach under the potatoes.
I sometimes splash a bit of balsamic vinegar into the onions.
I use more potatoes and more onions, since this is often the main dish and I want everyone to have one hearty piece on their plate, surrounded by vegetables.
Last night while preparing this I thought about a layer of pureed white beans, which I think I will try next time.

PERFECT 10 TART CRUST: A great 10-inch crust in 10 minutes
Also from Vegetable Heaven
(Can be used for a savory or a sweet tart. Super easy.)

1.5 C unbleached flour
pinch of salt 
1 stick of cold butter
1-3 T cold water

Place flour and salt in food processor, buzz once or twice, slice the butter into the bowl and pulse to crumbs. Continue to pulse as water is added one tablespoon at a time. As soon as the dough adheres when pinched stop adding water, turn it out, and push into a ball.

Roll into an 11 inch circle and lift into a 10 inch pan. Form an even edge all around. Wrap tightly and store in the fridge or freezer until ready to use.

Note: I always double this recipe. I use one in the tart pan for the recipe and flatten the other into a small disc and hold it in the fridge. When the pan is free I roll out the extra disc and place it in the pan, then freeze the whole pan. The frozen dough can be removed and frozen separately. No need to defrost when using. 

Butternut Squash Ravioli with Pecans and Sage

Pecans and sage are a classic combination with butternut squash, for good reason. Look for a quality brand of frozen ravioli, or be my hero and make some from scratch, and top the cooked ravioli with this:

Brown Butter, Pecans, and Sage

3-4 T butter (yes, you can use a lot more butter and get a more "saucey" product, but let's not!)
2 cloves of garlic, minced
2-3 T chopped fresh sage
2-3 T chopped fresh parsley
2 -3 tsp chopped fresh thyme, or less, dried
1/2 C pecans, toasted, chopped coarsely
sea salt

Melt the butter in a small nonstick skillet and add the garlic and herbs. Cook over low heat until the butter begins to brown; remove from heat and stir in pecans. The lower amount of butter will disappear leaving you with a lovely topping to spoon over the ravioli, and sprinkle with a bit of sea salt. Delicious, and not just on ravioli!