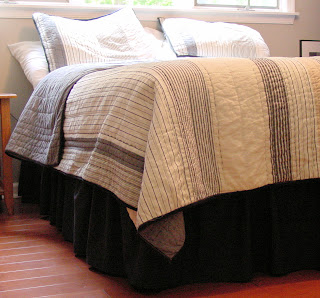
Dust ruffles are practical (they hide the stuff under the bed) and pretty (they finish a bedroom nicely) and annoying (they never stay where they are supposed to and are often a little too short or a little too long) and sometimes hard to come by (in the right color, mattress size, and length).
I fixed every one of those problems. You're welcome.
One of the bedrooms needed a black dust ruffle, full, ruffled-not-tailored, and with a 20" drop. Impossible to find in town, easy to order online, although as a 21" drop. After thinking through the steps of making a perfect dust ruffle for my master bedroom redecorating project, I came up with this method of altering a purchased dust ruffle to make it easier to install and live with. No velcro, no hot glue guns.
Keep in mind that a dust ruffle, or dust skirt, has two parts: the "deck" which is the flat piece of fabric that covers the box spring, and the ruffle, or skirt, which might be pleated or gathered. Either style of skirt will work with this method. You need your dust ruffle, shears, and a package of twisty pins, otherwise known as upholstery pins. You'll find them at fabric shops, dollar stores, and sometimes department stores.
1. Cut the center of the deck out of the ruffle by leaving a 4 inch border on top of the seam where the dust ruffle is attached. In my picture the ruffle is black, the deck is white (they usually are), and I have left a 4 inch border all the way around the dust ruffle.
Keep cutting around the entire dust ruffle, maintaining the same 4 inches, being careful to only cut the deck fabric. You will end up with this,a rectangle of fabric from the center of your dust ruffle. Rip it up, it will be a great addition to the rag pile. The dust ruffle is now a long strip, like this:
2. You need to finish the long edge you just cut, or it will continually unravel and be a nightmare after you wash it. You can serge the edge or zigzag it if you have machines. If you don't you could press a small hem and use fusible tape, or put in a movie and settle in for a handsewing session. I serged.
4. Work your way around the bed, paying attention to the hem and how even it is along the floor. Use as many pins as needed to keep the ruffle from shifting.
Easy to remove for washing, it will stay in place when the sheets are changed, and it can be adjusted all the way around. Not a bad 30 minutes!


1 comment:
Thanks for the comment on my blog! You identified exactly why i keep a blog - to keep a record of what I do. I've never been good about keeping a journal but I do love recording my activities via the blog!
I haven't had a chance to browse your blog yet but I look forward to seeing your creations!
Post a Comment